
Imagine waking up, walking into your kitchen, and crafting the perfect latte with smooth, velvety microfoam—just like the one your favorite barista serves you. If you own a Breville Barista Express, you're in the perfect position to bring that dream to life. However, mastering the art of milk steaming does take a little practice. Don’t worry—I’m here to walk you through the process, troubleshoot common challenges, and share tips to help you create café-quality drinks right in the comfort of your own kitchen. Discover the advanced features and performance of this machine in our Breville Dual Boiler BES920XL review
Why Steamed Milk Matters
Steamed milk is much more than just a frothy topping—it’s the heart and soul of many coffee drinks, such as lattes, cappuccinos, and macchiatos. When done properly, milk steaming transforms regular milk into a creamy, sweet, and smooth delight. This microfoam adds a soft texture, enhances the flavor, and improves the overall drinking experience. Whether you're crafting a simple latte or trying your hand at intricate latte art, having well-steamed milk is essential for a top-tier cup of coffee. Learn about the ease of use and innovation in our Breville Barista Touch Impress review
If you’re ready to take your coffee-making skills to the next level, then learning to steam milk correctly will open up a whole new world of coffee possibilities. Here’s how you can do it. Compare these two popular models in our Breville Barista Express Impress vs Pro review
What You’ll Need
To get started, you’ll need a few basic items. Here’s a checklist of essentials to ensure you get the best possible results:
- Breville Barista Express: This all-in-one espresso machine is a favorite among home baristas. It's equipped with a built-in steam wand that makes frothing milk a breeze.
- Cold Milk: Whole milk is usually the best option for creating rich, creamy microfoam, but there are great plant-based alternatives, such as oat milk or almond milk. Look for barista blends like Oatly Barista Edition or Califia Farms Barista Blend, both of which froth beautifully.
- Milk Frothing Pitcher: A stainless steel frothing pitcher is a must-have. The Rattleware Frothing Pitcher is a highly rated choice on Amazon and is perfect for beginners and pros alike.
- Thermometer (Optional): If you want to ensure your milk is the perfect temperature, a thermometer like the OXO Good Grips Frothing Thermometer will help you avoid scalding your milk or under-heating it.
- Espresso Shot: You’ll need a freshly brewed espresso shot in your cup before you start steaming the milk. Make sure you have this ready for pouring.

Step-by-Step Guide to Steaming Milk on the Breville Barista Express
1. Prep Your Breville Barista Express
Before you begin steaming, you need to ensure your Breville Barista Express is properly prepped:
- Heat the machine: Turn on your Breville Barista Express and allow it to warm up fully. Even once the steam button lights up, give it another minute for optimal readiness. This ensures that your steam wand is producing dry, powerful steam, which is crucial for creating great microfoam.
- Purge the steam wand: Before steaming, quickly turn the steam dial to purge any water inside the wand. This step ensures that you’re getting dry steam, which is important for frothing.
2. Fill the Milk Jug
Next, you’ll need to prepare your milk:
- Pour cold milk: Fill your frothing pitcher about one-third full with cold milk. The amount of milk you use depends on the size of your cup, but this will give you enough room to stretch and texture the milk without overflow.
- Milk choice: While whole milk is generally the best for steaming due to its high fat content, there are plenty of plant-based milk options available. Oatly Barista Edition and Califia Farms Barista Blend are both excellent choices for creating creamy, frothy milk.
3. Position the Steam Wand
Now it’s time to focus on positioning the steam wand properly to create the right texture:
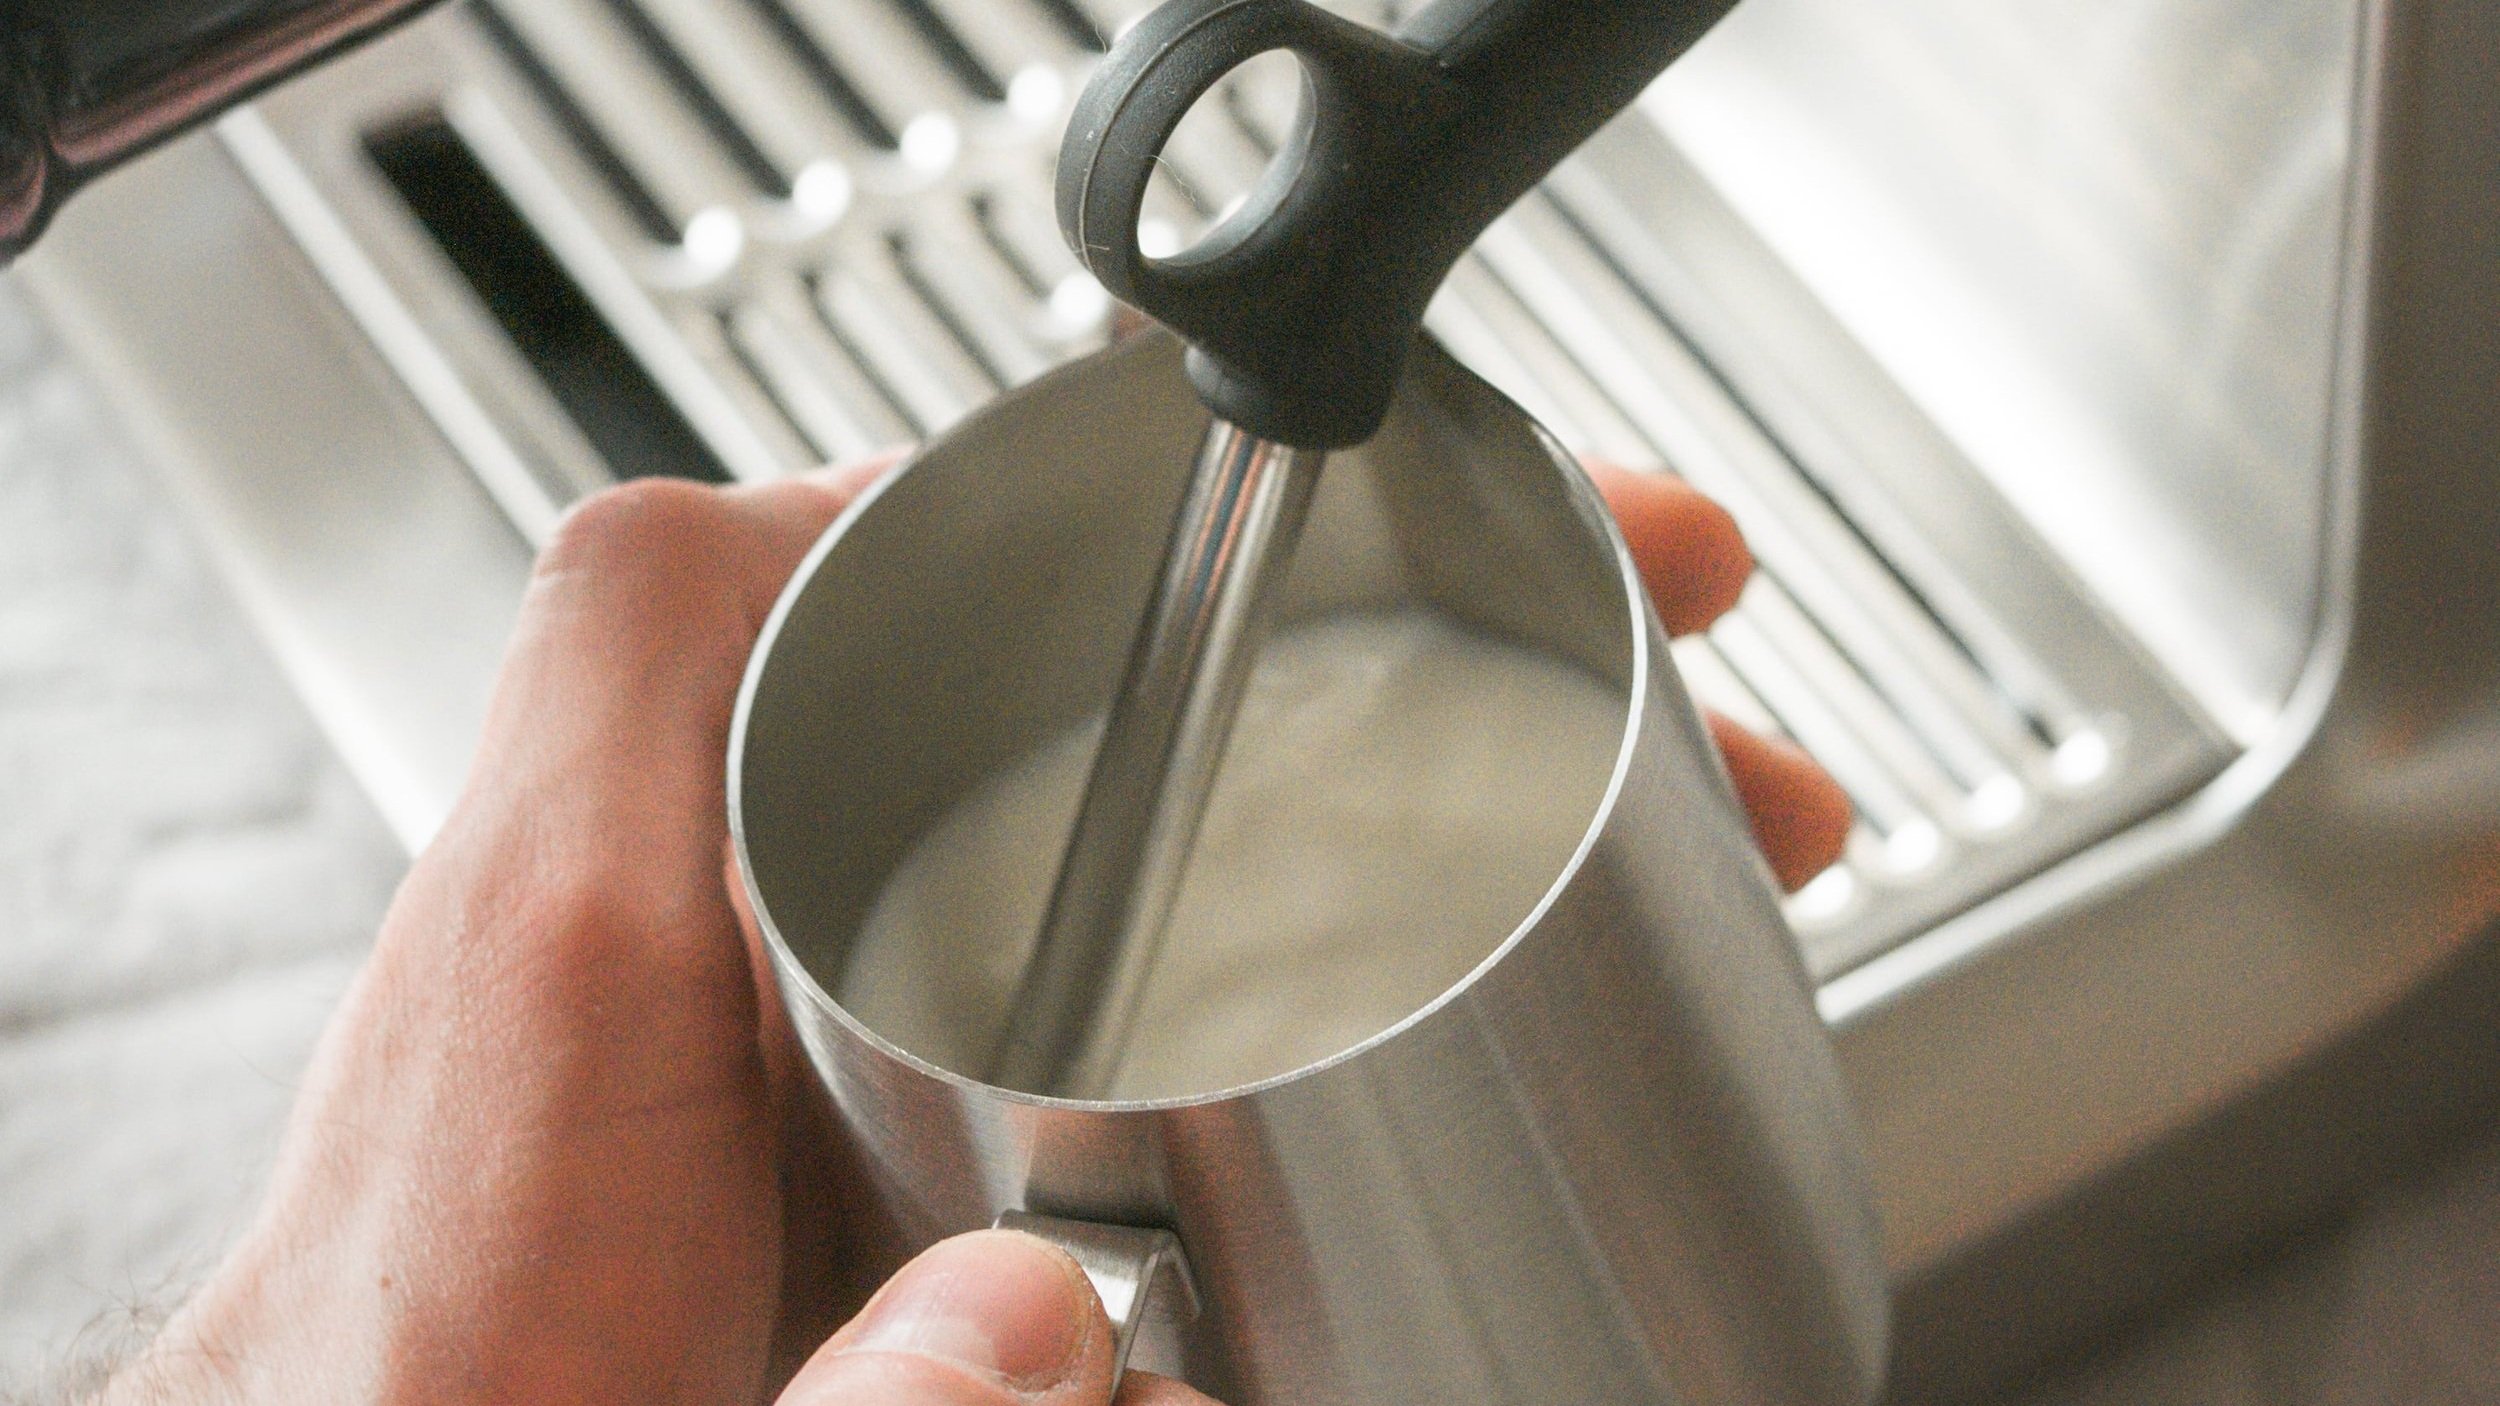
- Insert the wand correctly: Place the tip of the steam wand just beneath the surface of the milk at a slight angle (around 15 to 20 degrees). If the wand is too deep, you won’t introduce enough air into the milk, and if it’s too high, you risk splashing.
- Create the whirlpool effect: Once the wand is in place, angle the jug slightly to encourage a swirling motion. This creates the signature microfoam by blending the air into the milk and giving you a smooth, glossy finish.
4. Stretch and Texture the Milk
Steaming the milk involves two key phases: stretching and texturing. Find out which machine suits you better in our Breville Barista Pro vs Express review
- Stretching the milk: Turn the steam dial fully to engage the steam, and for the first 5–10 seconds, keep the wand tip near the surface of the milk. You should hear a gentle hissing or chirping sound as air is introduced into the milk—this is the stretching phase. This is when the milk expands, so it’s essential to avoid adding too much air, which can lead to large bubbles.
- Texturing the milk: After the initial stretch, lower the pitcher slightly to submerge the steam wand tip further into the milk. This phase is where the milk begins to heat up, and the foam is incorporated into the milk, giving it a velvety smooth texture. You want the milk to be creamy, not too airy.
Tip: The ideal temperature for steamed milk is around 150°F (65°C). If you’re using a thermometer, monitor the temperature closely. If you’re not using one, stop steaming when the milk pitcher feels too hot to touch comfortably. If you're using your hand to gauge the temperature, it should be too hot to hold for more than 3 seconds.
5. Finish and Clean the Steam Wand
Once you’ve achieved the perfect texture, it’s time to finish up:
- Turn off the steam: Release the steam wand and turn off the steam dial. Immediately, use a damp cloth to wipe down the wand, cleaning off any milk residue.
- Purge the steam wand: Once again, quickly turn the steam dial to purge any leftover milk from the wand. This ensures that the wand stays clean and ready for the next use.
- Tap and swirl: Tap the pitcher on the counter to break any large bubbles that might have formed during the steaming process. Then, swirl the pitcher gently to incorporate the foam into a smooth, glossy consistency.
How to Pour Steamed Milk
Once your milk is steamed to perfection, it’s time to pour it into your espresso and create a beautiful, flavorful drink. Here's how:
- Blend first: Start pouring close to the espresso shot to mix the milk and coffee seamlessly.
- Raise and slow down: As you continue pouring, raise the jug slightly while slowing the flow. This gives you more control over where the foam lands.
- Try latte art: As you gain experience, you can experiment with simple latte art designs like hearts or rosettas. It takes a bit of practice, but you’ll soon be able to create beautiful designs with your frothy milk.
Common Problems and How to Fix Them
Even the most experienced barista runs into challenges with milk steaming. Here are some common issues and how to troubleshoot them:
- Problem 1: Milk Doesn’t Froth
- Solution: Ensure the steam wand is positioned just under the surface of the milk, not too deep. Also, use cold milk and make sure to purge the steam wand before starting.
- Problem 2: Large Bubbles
- Solution: Large bubbles form when too much air is introduced into the milk. Keep the steam wand near the surface to avoid splashing and introducing excess air.
- Problem 3: Milk Scalds
- Solution: If you notice the milk developing a burnt taste, stop steaming once the pitcher feels too hot to hold comfortably. If you’re unsure, use a thermometer to keep track of the temperature.
- Problem 4: No Whirlpool Effect
- Solution: Adjust the angle of the pitcher or steam wand to encourage the swirling motion. This helps create the smooth, creamy texture you’re aiming for.
Best Amazon Products for Milk Steaming
To help make your milk-steaming experience smoother, here are some highly rated tools available on Amazon that can assist you in achieving perfect microfoam:
- Breville Barista Express: This espresso machine is a favorite for home baristas due to its user-friendly design and high-quality steam wand.
- De’Longhi Stainless Steel Milk Frothing Pitcher: Ideal for both beginners and professionals, this pitcher is designed to make frothing easier and more consistent.
- Oatly Barista Edition Oat Milk: A top pick for dairy-free milk options, this oat milk froths beautifully and creates a creamy texture.
- Digital Thermometer by Habor: A reliable, affordable thermometer that ensures your milk reaches the perfect temperature every time.
- Cleaning Brush for Espresso Machines by Impresa: Keeping your steam wand clean is essential for maintaining performance and hygiene.
FAQs About Steaming Milk
Can I use plant-based milk?Yes! Look for barista-grade plant-based milks like Oatly Barista Edition or Almond Breeze Barista Blend, which are specially formulated for frothing. Explore the key differences between these premium machines in our Breville Oracle vs Oracle Touch review
How can I prevent overheating the milk?Use a thermometer for accuracy or rely on the heat of the pitcher. When the pitcher feels too hot to comfortably hold, it’s time to stop steaming.
What’s the difference between latte and cappuccino milk?A cappuccino has more foam, while a latte focuses on creamy, smooth microfoam with less froth.
Final Thoughts
Steaming milk on the Breville Barista Express is a skill that takes practice but pays off in the form of delicious lattes, cappuccinos, and more. By following these steps and using quality tools, you’ll soon be able to master the art of frothing. With time and persistence, you’ll not only create drinks that rival your local café, but you might even start impressing friends with your latte art. So, get ready to enjoy your perfect cup of coffee, made right at home.
Your kitchen might just become the coziest coffee shop in town!