
Crafting a perfect cup of coffee at home can feel like a personal victory, especially when you master the art of steaming milk. Whether you're enjoying a rich cappuccino or a silky latte, steaming milk properly transforms an ordinary espresso into something extraordinary. If you're using the Breville Barista Express, you already have a powerful machine that makes this process a lot easier. But like any skill, learning to steam milk with precision takes a bit of practice and patience. Uncover the brewing precision of the Breville Dual Boiler BES920XL review
In this detailed guide, I’ll walk you through the steps to steam milk perfectly using the Breville Barista Express, with helpful tips and tricks to ensure your results are consistently smooth, creamy, and café-worthy. By the end of this guide, you'll be able to create microfoam that rivals your favorite coffee shop. Learn how this model blends convenience with innovation in the Breville Barista Touch Impress review
Understanding the Breville Barista Express Steam Wand
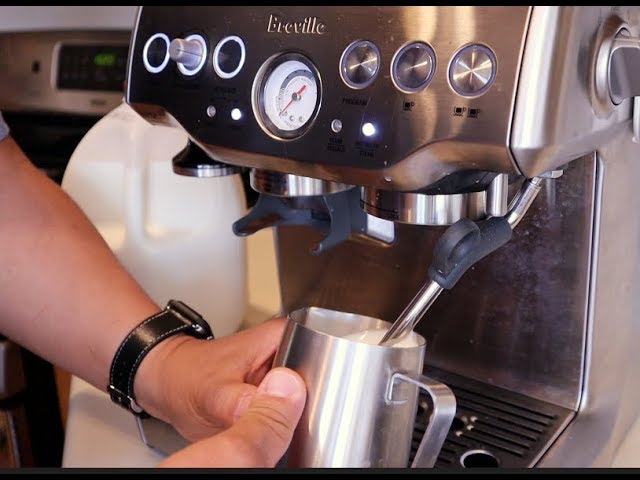
The Breville Barista Express is a popular choice among coffee enthusiasts, particularly because of its reliable steam wand. One of the standout features is its 360-degree swivel design, which makes it easy to position the steam wand regardless of your experience level. As a beginner, you’ll appreciate how manageable the steam wand is, and as you get better, the flexibility will help you make more refined adjustments. Compare these top models to find your perfect match in the Breville Barista Express Impress vs Pro review
Before starting, it’s essential to warm up the machine to ensure that the steam pressure is optimal. When the indicator lights are steady, you’ll know it’s ready to go. This simple step is often overlooked, but if you skip it, you might notice inconsistencies in the foam—something I learned the hard way in my early attempts. See what makes these machines stand out in the Breville Barista Pro vs Express review
Prepping the Milk: Choosing the Right Type
Your milk choice significantly impacts the texture and taste of the foam. Here's a breakdown of the most popular options:
- Whole Milk: This is the go-to milk for many baristas, and for good reason. Its higher fat content creates a rich, creamy microfoam that’s perfect for lattes and cappuccinos. Whole milk is generally easier to froth, making it a good choice if you're just starting out.
- Skim Milk: While this milk creates a lighter, airier foam, it lacks the creamy texture of whole milk. Skim milk can still produce great froth, but you may notice a difference in mouthfeel.
- Plant-Based Milks: For those who prefer non-dairy options, barista-grade oat milk (like Oatly Barista Edition) or almond milk are excellent choices. These have a higher fat content than regular almond or soy milk, which helps them foam better. It's crucial to use barista-grade versions, as they are formulated to froth more effectively.
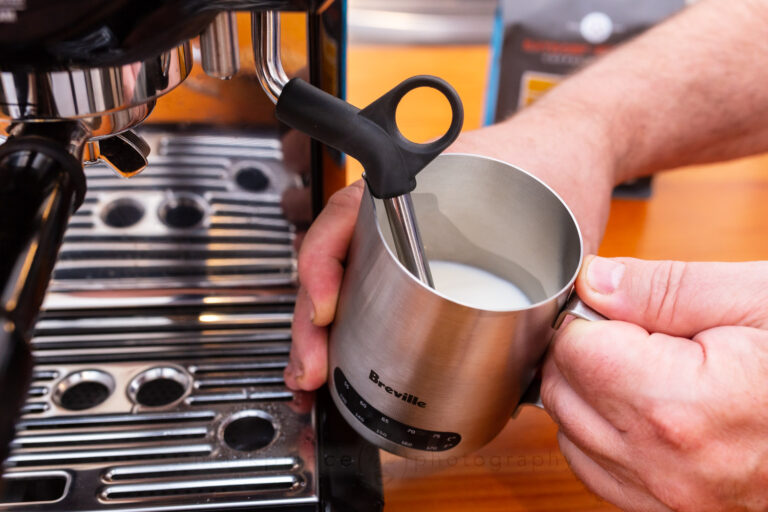
The Milk Jug
To get the best results, you’ll need a stainless steel milk jug, such as the Rattleware Frothing Pitcher. This type of jug not only ensures better heat conduction but also allows you to feel the temperature as you steam, giving you more control. When filling the jug, aim for about one-third full, just below the spout. This leaves room for the milk to expand as it froths. Explore the key differences between these premium machines in the Breville Oracle vs Oracle Touch review
Step-by-Step Guide to Steaming Milk on the Breville Barista Express
- Purge the Steam Wand
- Before you begin steaming, it’s important to purge the steam wand. Turn the steam knob on for a few seconds to release any water that may have condensed inside the wand. This ensures that the steam you use will be dry, which is essential for creating smooth microfoam. Trust me—if you skip this step, your milk may turn out watery, and your foam may not have the right texture.
- Position the Steam Wand
- Now comes the key to creating the perfect foam. Submerge the tip of the steam wand just below the surface of the milk and position it slightly off-center of the jug. Tilting the jug at a slight angle will help create a whirlpool effect, which is crucial for incorporating air evenly into the milk. Keep the wand near the surface to allow air to be drawn in but not too high that it creates large bubbles. The goal here is to create microfoam, which is smooth, creamy, and velvety.
- Stretch the Milk (Incorporate Air)
- Turn the steam knob to full power. You should immediately hear a gentle “hissing” sound, which means that air is being introduced into the milk. For the first 3-5 seconds, keep the wand just below the surface to allow the milk to stretch. During this phase, you'll notice the milk expanding as the air incorporates into it, creating tiny bubbles. It's crucial not to overdo this stage. If you add too much air, the milk will become bubbly and frothy instead of smooth and velvety.
- Texture the Milk
- After stretching, fully submerge the steam wand to heat the milk and create a smooth, glossy finish. The milk should be swirling in a gentle whirlpool motion. If done correctly, the foam will integrate into the milk, creating a creamy, shiny texture. This is what baristas refer to as “texturing” the milk, and it's essential for creating that professional, silky finish.
- Monitor the Temperature
- At this point, your focus should shift to monitoring the temperature of the milk. The goal is to stop steaming when the milk reaches around 150°F (65°C). At this temperature, the milk will be hot but not scalded, and the texture will be perfect for pouring into your espresso. You can use your hand to gauge the heat: once the jug becomes too hot to hold for more than a second, stop steaming.
- For more precise results, you can use a Frothing Thermometer like the one from X-Chef. This tool will help you avoid overheating the milk, which can result in burnt milk and ruined foam.
- Shut Off the Steam
- Once the milk reaches the desired temperature, turn off the steam knob before removing the wand from the jug. This step is crucial as it helps prevent milk from splattering, ensuring a clean and professional finish.
Final Touches: Tapping, Swirling, and Pouring
- Tap and Swirl: After steaming, tap the jug on the counter to release any large bubbles that may have formed. Swirl the milk gently in the jug to mix the foam and liquid together, resulting in a velvety consistency. This is an important step, as it ensures a smooth and even texture in the milk.
- Clean the Steam Wand: Don’t forget to clean the steam wand right after use. Wipe it with a damp cloth and purge it again to remove any milk residue. Regular cleaning prevents build-up and ensures that your steam wand remains in top condition.
- Pour the Milk: When pouring your steamed milk into your espresso, start from a higher height to mix the milk with the coffee. As you get closer to the cup, you can pour more slowly to create latte art. If you’re new to latte art, try starting with a simple heart or dot design.
Troubleshooting: Common Issues and How to Fix Them
- Bubbly Foam: If your foam is bubbly and not creamy, it means you've introduced too much air during the stretching phase. To fix this, ensure the tip of the wand is just below the milk's surface and lower it after the first few seconds.
- Flat Milk: If your milk doesn’t foam up at all, you may not have incorporated enough air. Try positioning the wand closer to the milk's surface during the stretching phase to ensure air is drawn in.
- Scorched Milk: Overheating milk can result in a burnt taste and poor texture. If you notice your milk getting too hot to hold, stop steaming immediately. Using a thermometer can help prevent this.
Tips for Success
- Use Fresh Milk: Fresh milk contains active proteins that are crucial for creating stable foam. If your milk is past its prime, it will be much harder to froth properly.
- Experiment with Plant-Based Milks: Barista-grade oat milk, such as Oatly Barista Edition, works wonderfully for frothing and often produces a foam that’s quite similar to dairy milk. If you're experimenting with other plant-based milks, look for those specifically designed for frothing.
- Practice: Steaming milk is a skill that improves with practice. Spend time experimenting with different techniques, temperatures, and milk types. The more you practice, the better your results will become.
Exploring Latte Art
Once you've perfected steaming milk, you can start experimenting with latte art. Simple designs like hearts, rosettas, or tulips are great for beginners. The key to successful latte art is having the right milk texture—smooth, glossy, and free of large bubbles. Well-textured microfoam makes pouring intricate designs much easier and will impress your friends and family.

Conclusion
Steaming milk on the Breville Barista Express can elevate your coffee game and bring the café experience right into your kitchen. With the right technique, equipment, and practice, you'll be able to create smooth, creamy microfoam every time. From choosing the best milk to perfecting your pouring skills, each step is important in crafting that perfect cup of coffee.
Don't be discouraged by mistakes—they’re an essential part of the learning process. Keep experimenting, and before long, you’ll be able to craft lattes and cappuccinos that look as good as they taste, impressing everyone with your newfound barista skills. Happy steaming!
FAQs
Q: Can I use non-dairy milk for steaming?
Yes! Barista-grade oat milk, almond milk, and soy milk work well for frothing, as they have a higher fat content, which makes them easier to steam.
Q: Why is my steamed milk not glossy?
Glossy milk is a sign of well-textured microfoam. Make sure you’re using the whirlpool motion to integrate the foam and avoid over-aerating during the stretching phase.
Q: What’s the best jug size for steaming milk?
A 12-20 oz stainless steel jug is ideal for beginners. It’s easy to handle and provides enough space for proper milk expansion.
Q: Why does my milk taste burnt?
Burnt milk is the result of overheating. Stop steaming when the jug becomes too hot to hold comfortably or use a thermometer for more precision.
Q: How do I clean the steam wand properly?
Wipe the wand immediately after use with a damp cloth and purge it to remove any milk residue. This helps maintain the steam quality and prevents clogs.